My Astro-Imaging Rig
I know some people have been interested in what equipment I use so here you go… (skip to the bottom if you don’t want to hear a, much longer than anticipated, story… lol)
Just a little background, I started out with a Meade LX90 10″ ACF SCT. I used a Canon Rebel T3i with it as well. I was able to capture a few things with this setup but I can tell you it was not easy. I had to put the entire fork mount on a wedge and that thing is heavy. Trying to get it setup took so much effort I just wouldn’t use it much. After several years of it sitting next to my window, looking great but doing nothing, I happened into a pretty good deal on a Sky-Watcher EQ6-R Pro mount. I de-forked the 10″ and got it setup to ride on the new mount. That made a huge impact on how often I would use the scope. Setup was much easier and the stability was greatly improved. However, during those years of it sitting by the window I actually moved from a really dark location to the middle of town (not a very good idea for those interested in astronomy). The SCT is an F10 with a focal length of about 2500mm. It’s slow, slow, slow.
Light pollution, slow scope, and a not so great camera all resulted in me wanting more. I decided it was time to get a CCD camera so I did a bunch of research and decided on an ATIK 16200 Mono camera with the ATIK EFW3 filter wheel and OAG. This was going to be a good setup for the 10″ SCT putting me at about 0.49 arc-seconds per pixel with no reducer. That’s an “okay” place to be when the seeing is good but you really want to be between 1 and 2 arc-seconds per pixel. Here’s a link to help you figure out a good ccd camera for your scope: http://astronomy.tools/calculators/ccd_suitability.
When I purchased the CCD camera I decided it was time that I get a small refractor to ride on top of the SCT as a guide scope. I purchased an Explore Scientific ED80 Triplet that was on sale at adorama.com. This is when things started getting crazy. I decided to have a peak through the ED80 at Jupiter and Saturn… Wow! I was used to my SCT and things can be a bit fuzzy. This was my first refractor and I could not believe how sharp the planets looked! It was totally different and I completely under-estimated the little ED80… I decided I would try taking a picture using the new CCD camera and the new scope. I tried the highest thing in the sky which just so happened to be the North America Nebula. The first image I took, using my Baader Ha 7nm filter, I was so amazed I have not ever tried the CCD camera with the SCT. Don’t get me wrong I will be giving the SCT another shot but right now I am in love with refractors. Once I’ve had my fill I will try the SCT out as I’m sure it can do a great job too, just not right now. The image on the main site page was taken with the ES ED80 and I have a portfolio post detailing the image. It’s a 5 part mosaic but has a lot of hours in it but I am really happy with the results. In fact, at this point most of the images in the portfolio section have been taken with the ES ED80, it is a really great scope. I did do some upgrades to it but the overall it is a really great scope and I only paid $630 bucks for it!
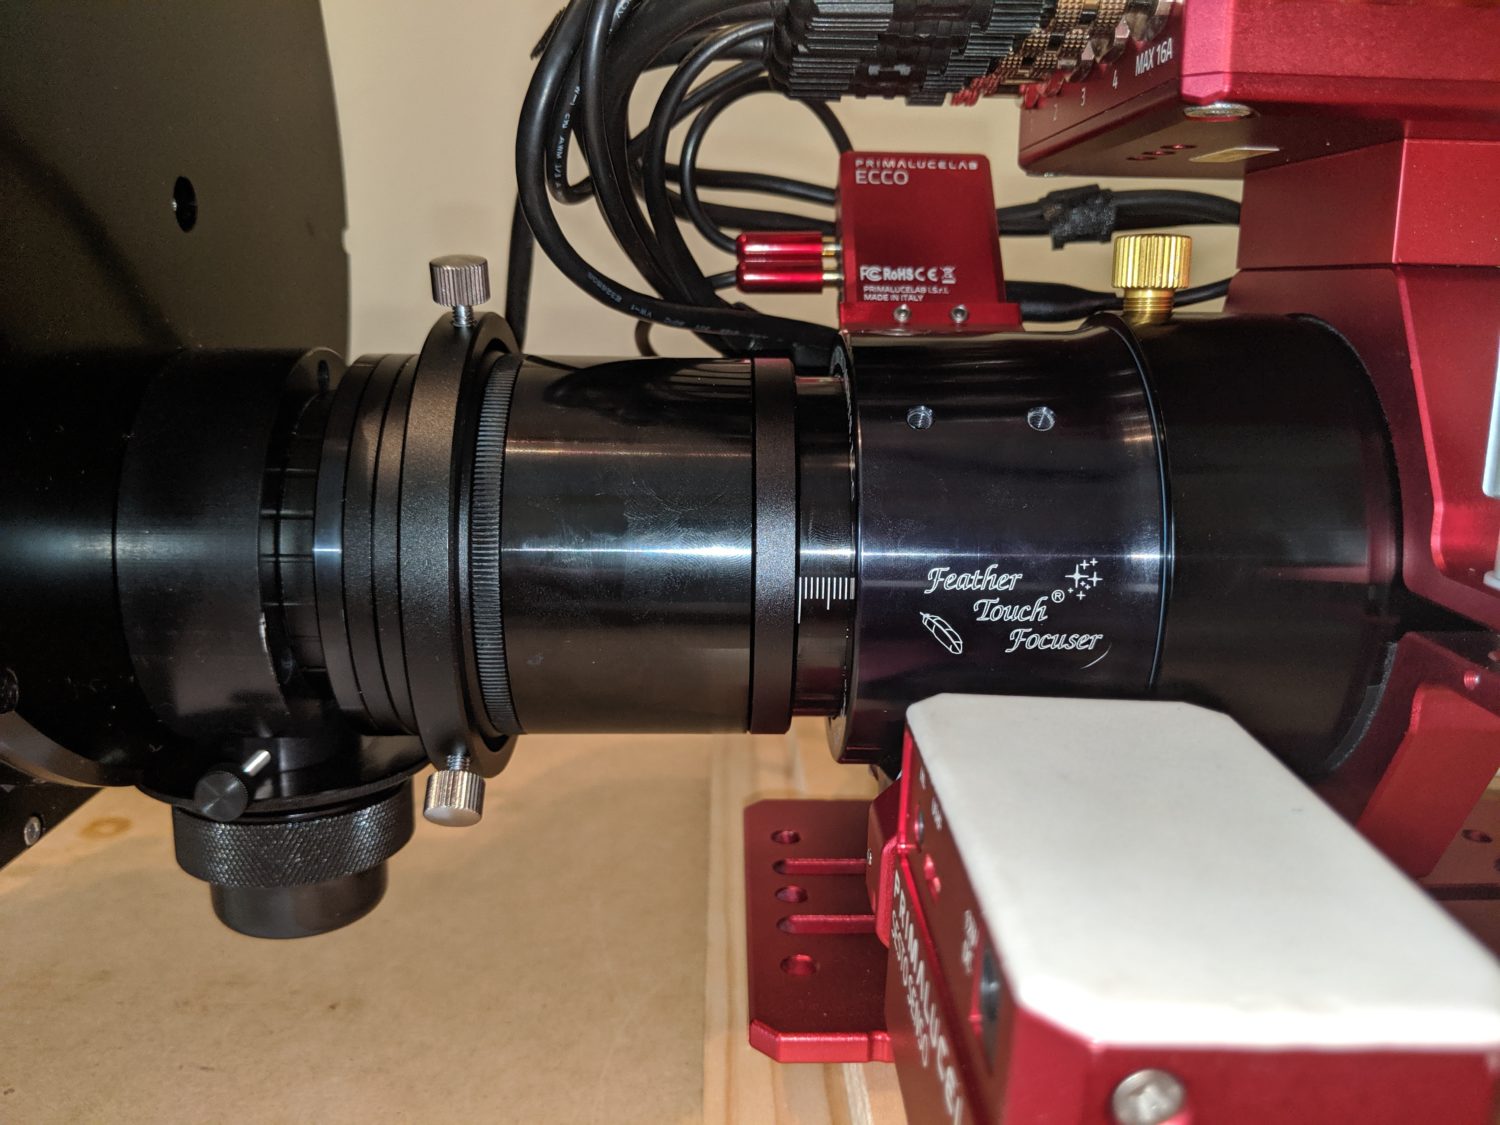
One of the upgrades I did to the scope was install a 2.5″ Feathertouch focuser. I can’t say enough good things about the Feathertouch focuser. The quality is simply amazing. Also, I worked with Simon from telescopes.net and Wayne from starlightinstruments.com to get the focuser. As great as the focuser is, it doesn’t even come close to comparing to the excellent service that both Wayne and Simon have provided. Excellent people that went out of their way to help me get what I needed and help with some other issues that I was having (more on that in another post). Once the focuser was installed I decided I needed to have the scope collimated. Luckily, I live about an hour away from Explore Scientific. I spoke to Kent with explorescientificusa.com and he said I could bring it in and even watch the whole process! I was really excited about this and had a great time at the store. I met several people from ES, all of which were great! While I was there, my wife an I were admiring the scopes in the store section. I was like a kid in a candy store! Just so happened that they were having a sale on a few of their scopes…
While I was there I started looking at a 115mm scope that had FPL53 glass. While I was wishing I could afford it I was informed that they have a trade-up program. I had no idea… I asked them it they would mind telling me what my scope would be worth as a trade in and the number they came back with was much, much!, better than I thought it would be. The scope I wanted, ED115 FPL53 was on sale and the price drop was quite considerable. I still couldn’t afford it but I guess my wife could see the gears turning in my head… just trying to figure out a way to walk out with that scope. Then, unexpectedly, she offered to buy it for me! I was so beside myself I thought I was having a dream! That brings us to what I have now.
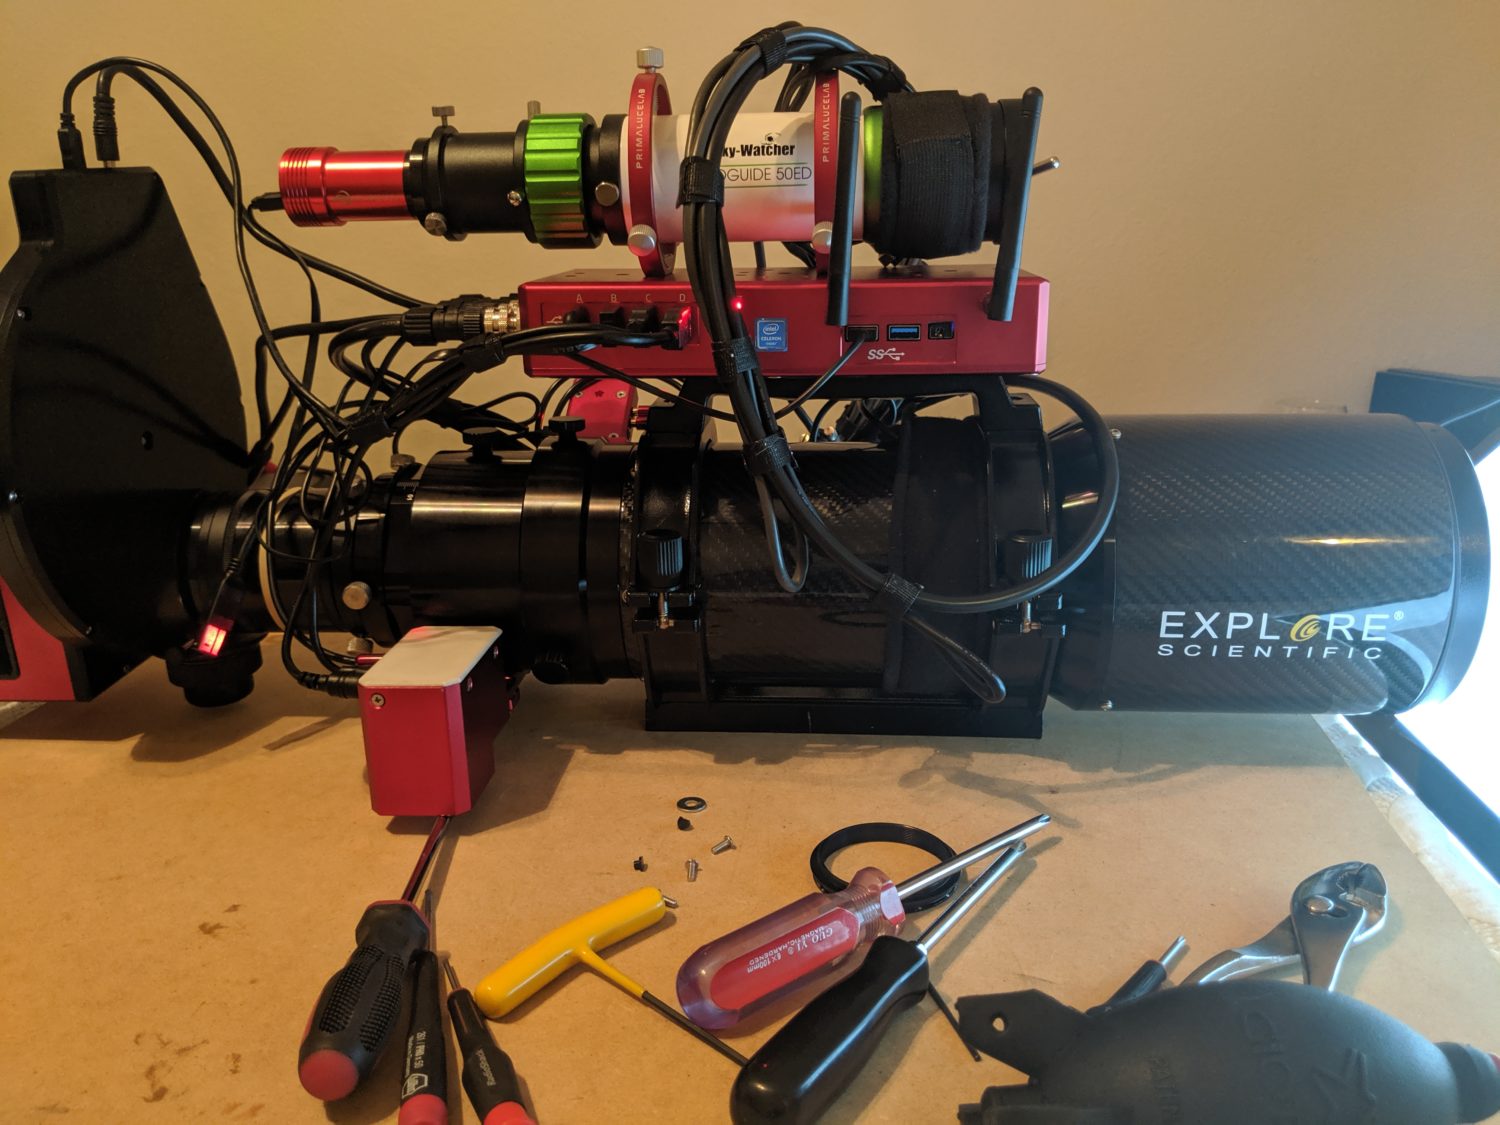
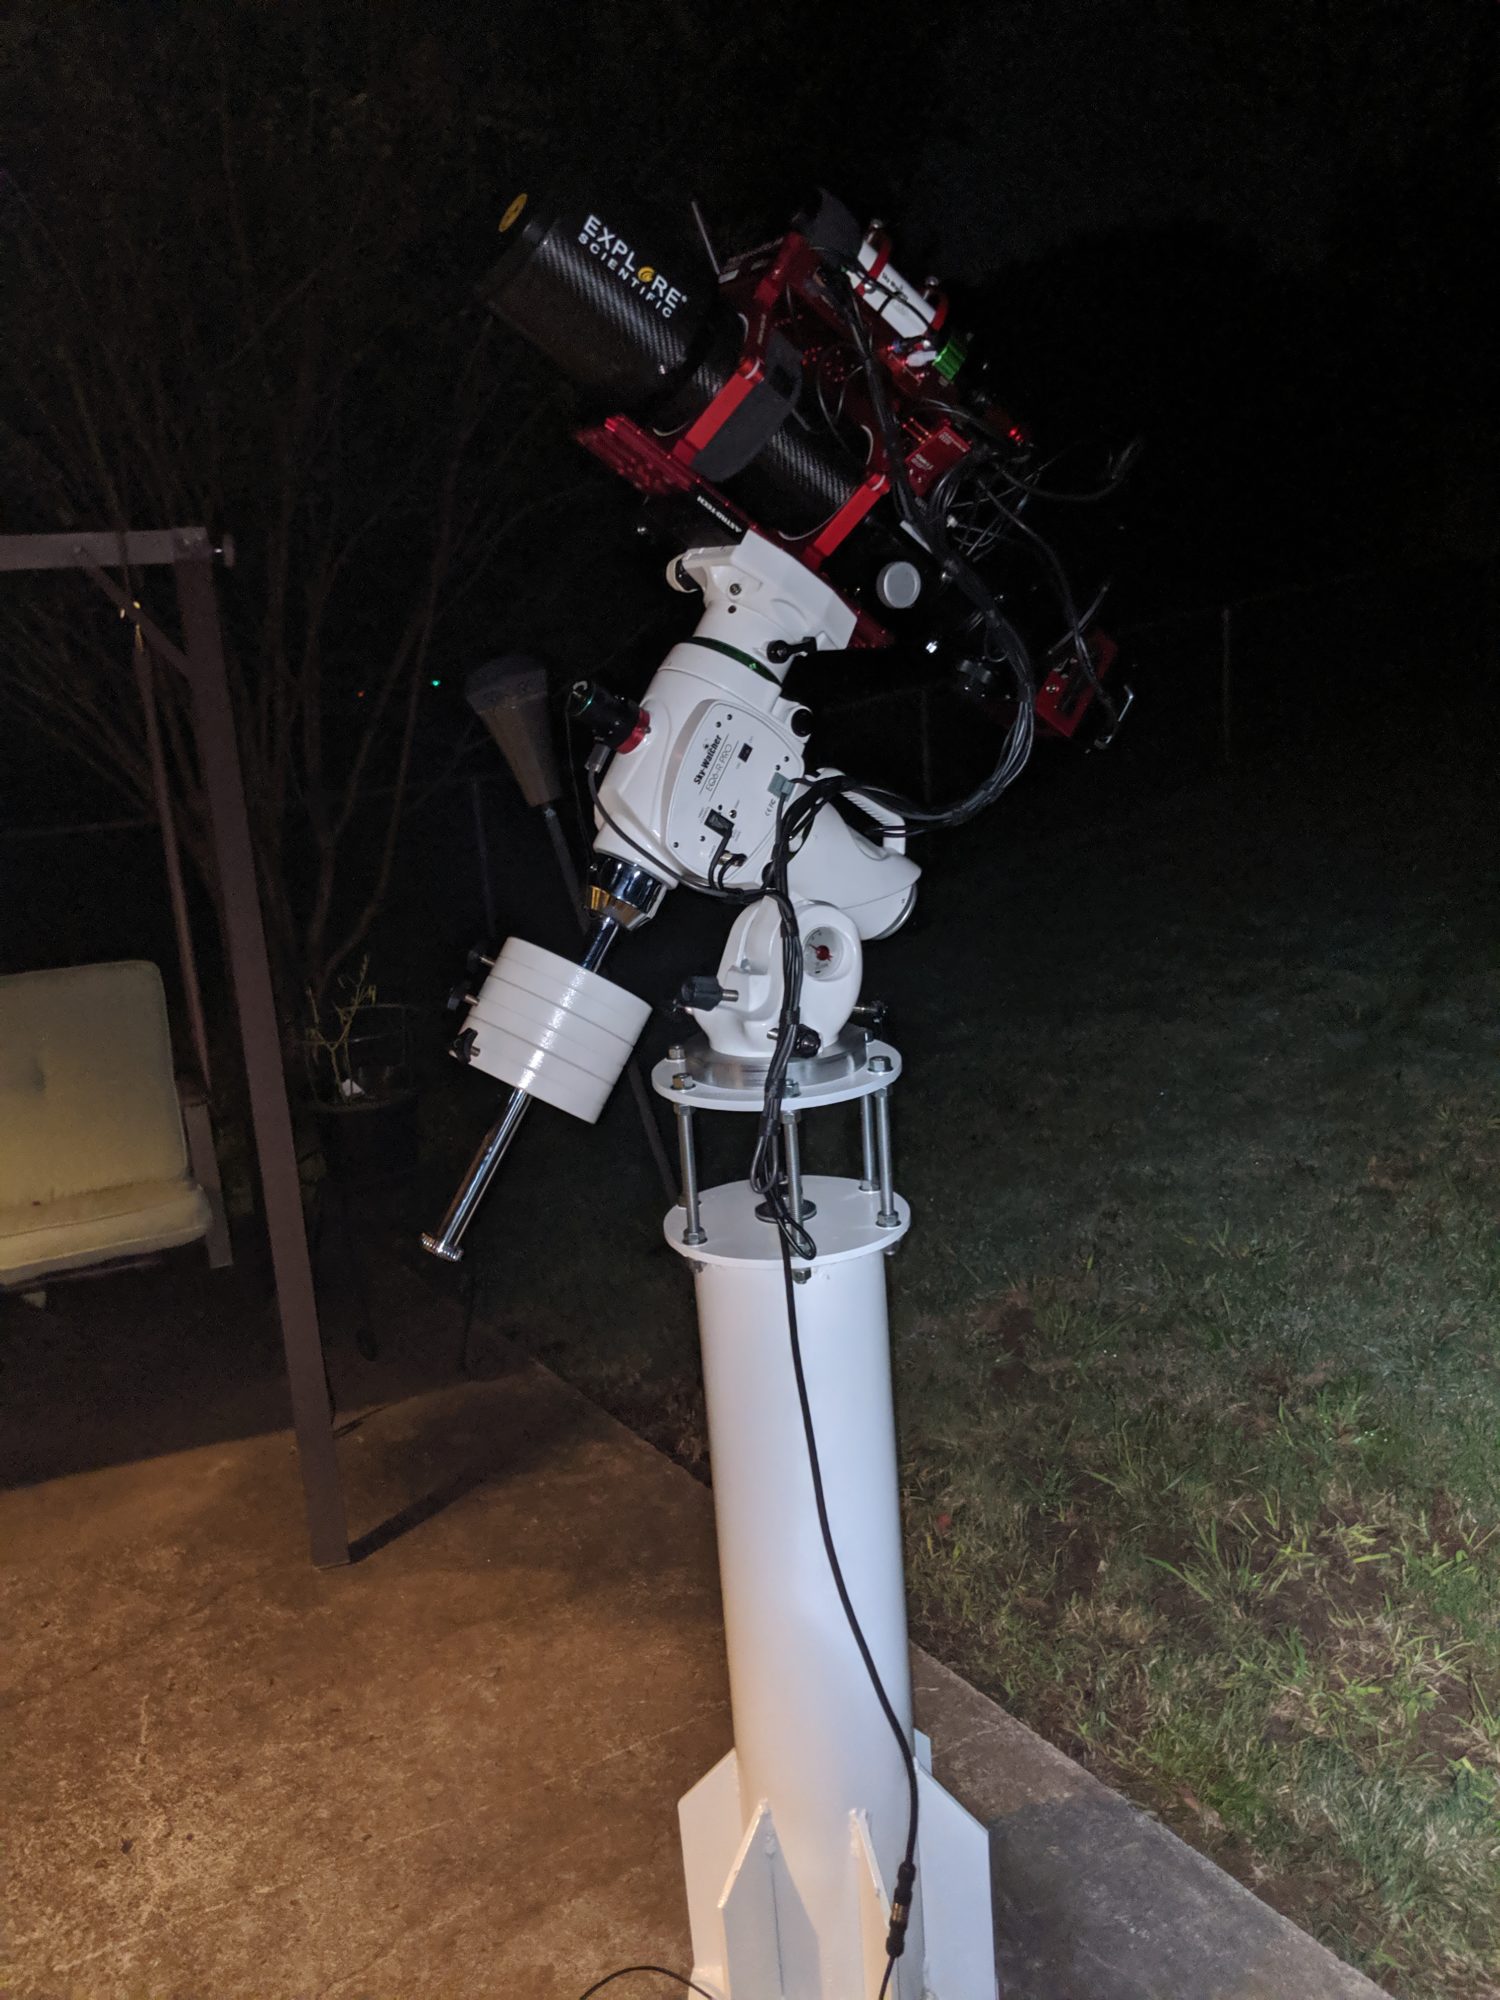
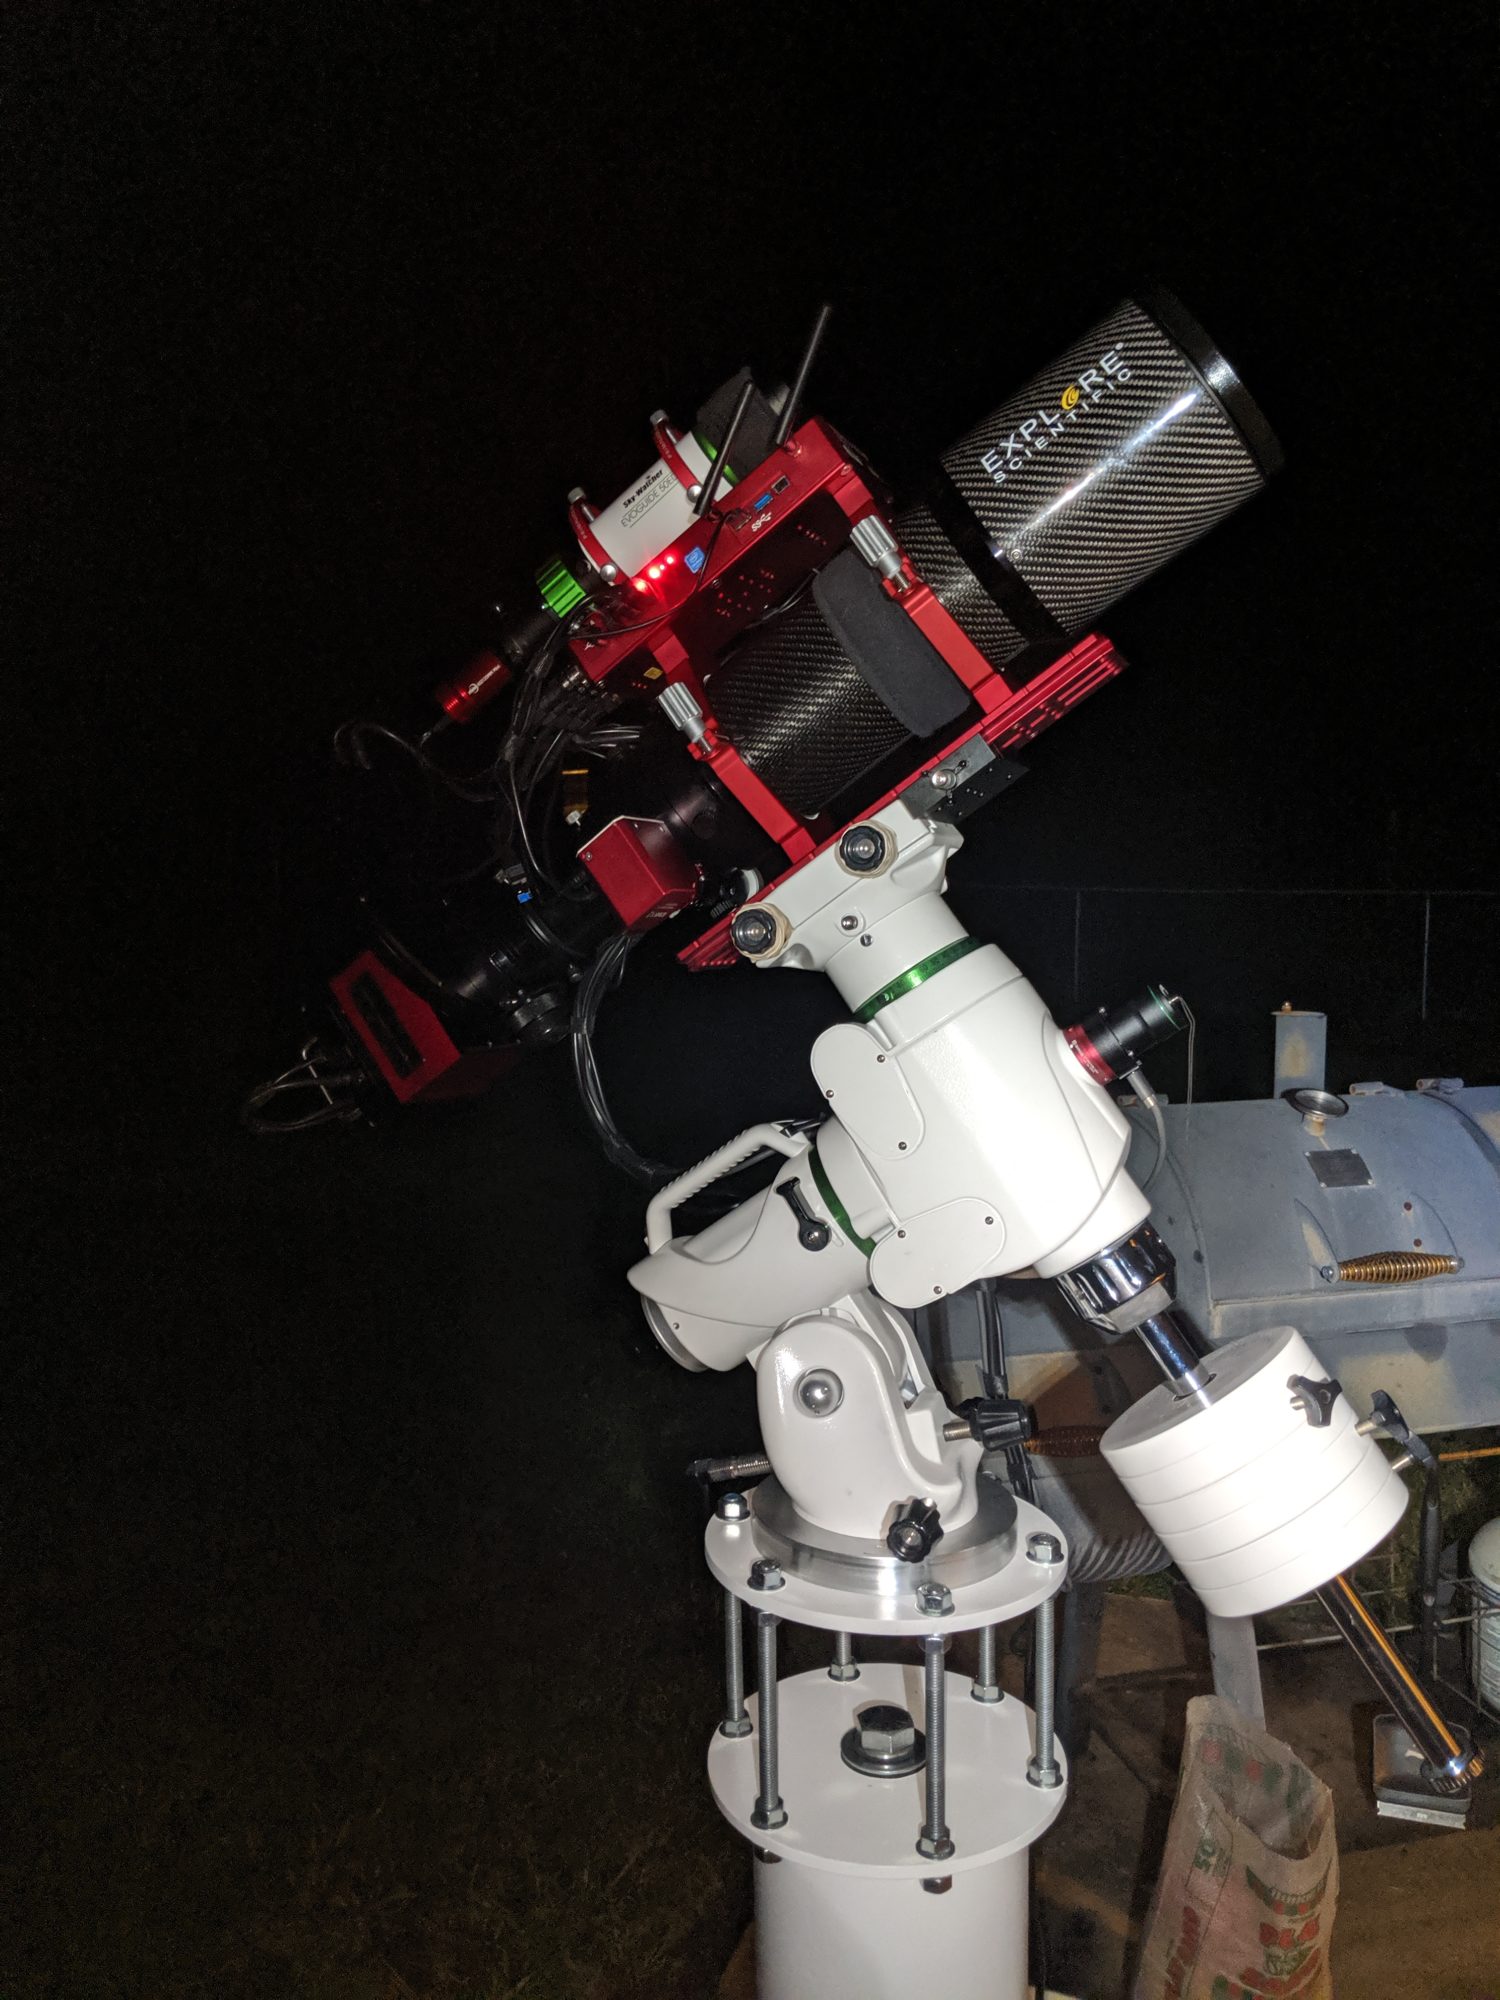
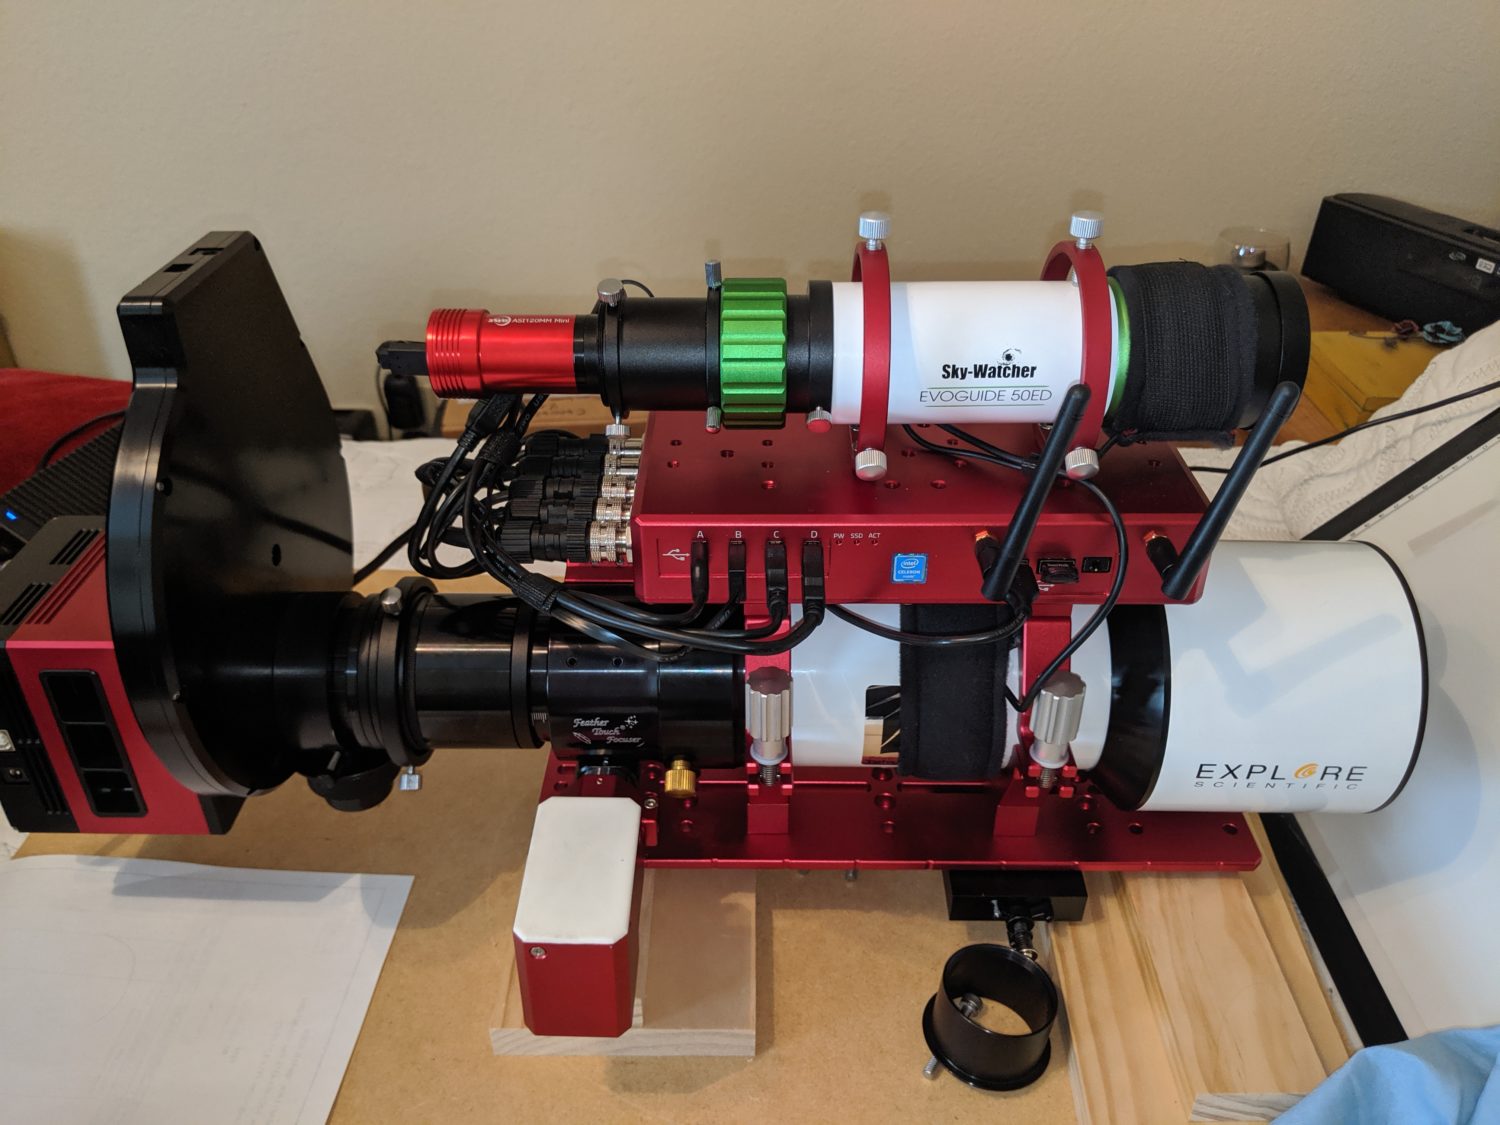
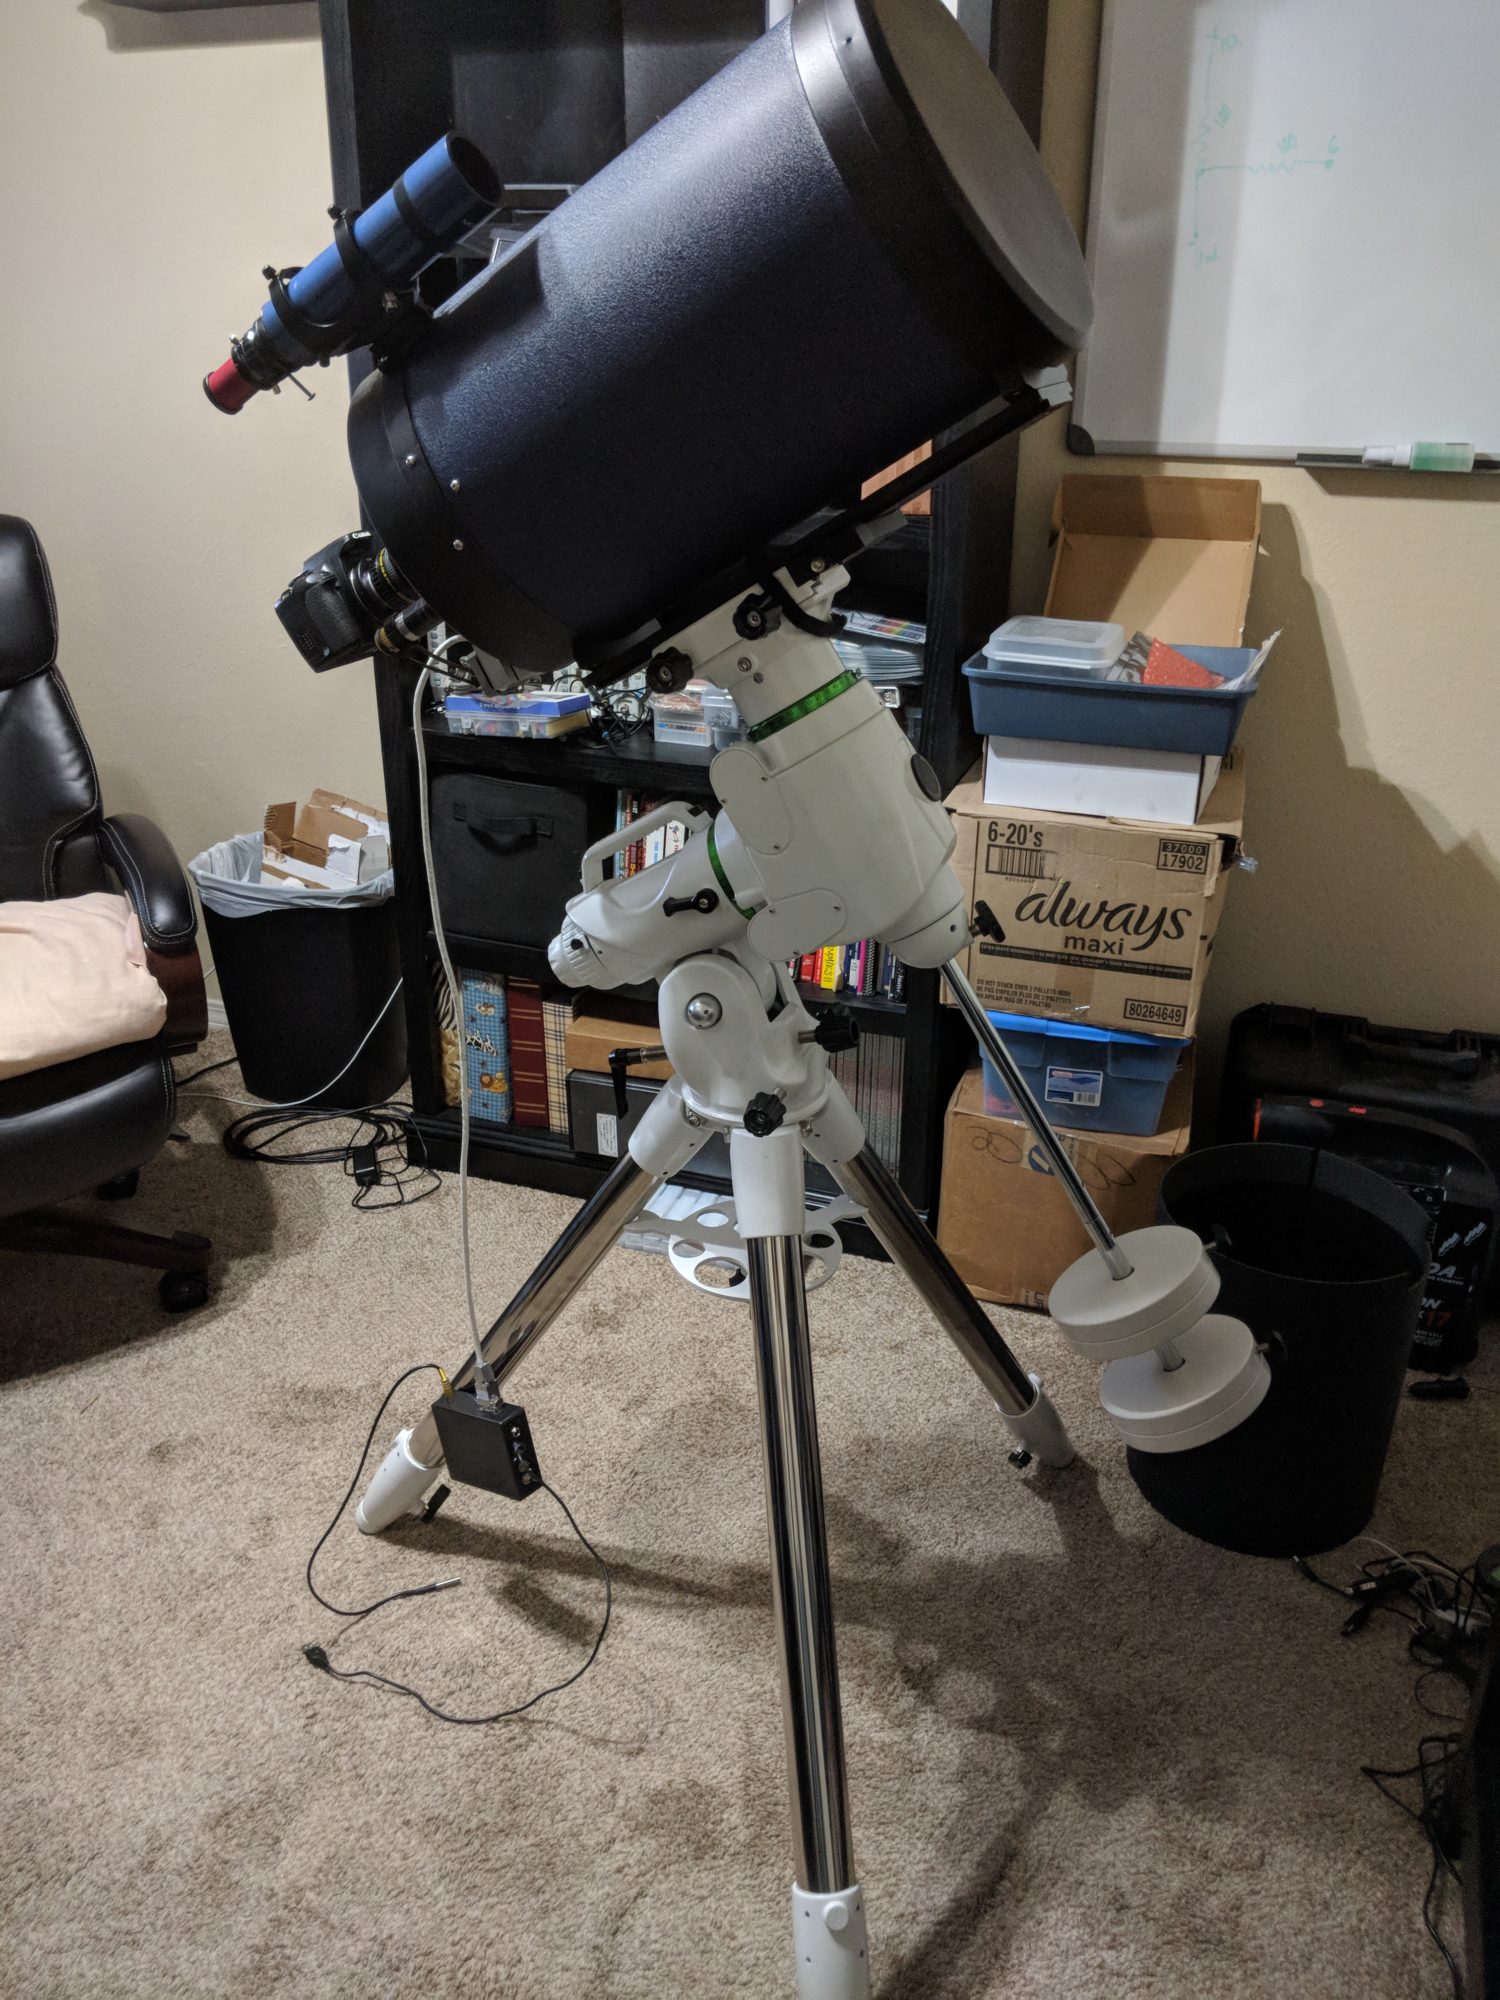
Starting from the bottom up… I made a pier for the mount so I could get the best stability I could. I will be adding a post on the build soon (likely today). Next up is the Sky-Watcher EQ6-R, slightly modified with a 1″ counterweight bar and completely torn apart, re-greased, and carefully adjusted. I have a QHY Polemaster installed for polar alignment as well. Next is Primalucelab 350mm dovetail mounting plate, 122mm scope rings, an Eagle 3 computer, with guidescope rings holding a Sky-Watcher 50mm guide scope. Also, a Primalucelab Sesto Senso focus motor and ECCO dew controller with a dew strap for the main and guide scopes. The Explore Scientific ED115 FPL53 telescope is fitted with a 3″ Feathertouch focuser. The focuser that came with the scope is of very good quality, not as good as the Feathertouch but still very good. I happened to get a great deal on the Feathertouch because Wayne let me exchange my 2.5″ for this 3″ (I had only had it a short while but I’m very glad he allowed it… it really helped me out!) The image train consists of a TS-Optics 68mm TSFlat2.5 flattener with the needed adapters from teleskop-express.de, ATIK OAG, ATIK EFW3 filter wheel, Baaders filters (LRGB, Ha 7nm, OIII 8.5nm, and SII 8nm), and the ATIK 16200 Mono camera. I am using a ASI120 Mini for the guide camera. I leave the guidescope on in case I can’t find a suitable guide star in the OAG. So far I have not had a problem but it’s there if I need it. Check out the Andromeda Galaxy post in the portfolio section to see the first image I have taken with this scope. Very impressed!
I use PixInsight for my image processing and some photoshop. PixInsight is well worth the money if you have the time to learn it. I highly suggest making time to learn it. I’m no expert by any means but I’m starting to get the hang of it. I plan to re-visit all of my images as my skills are improved so be sure to take a look at older posts every now and then because the image quality might be much improved. I ordered a book called Mastering PixInsight but it will not be here until this November sometime. Can’t wait to go through it so hopefully I can learn to processing images better. In the mean time, I watch videos and lookup tutorials online, of which there are many. To me, learning the editing software and image processing is just as fun as capturing.
Well I think I have said enough for one post, until next time Clear Skies!

This Post Has 0 Comments